Welcome to Source Compare!
Whether you are a designer, developer, project manager or someone else interested in the assets of a project, Source Compare allows you to keep track of all of them in one place using version control and voting to keep everyone on the same page.
Source Compare allows you to keep track of all the images that you use in the lifecycle of a project all in one place.
Getting Started with Source Compare
When you log in, the projects page is the first thing that you will see. This will have a list of all the projects that you have created or been invited to. You may create a new project or click on an existing one to move to the project page.
Project Page
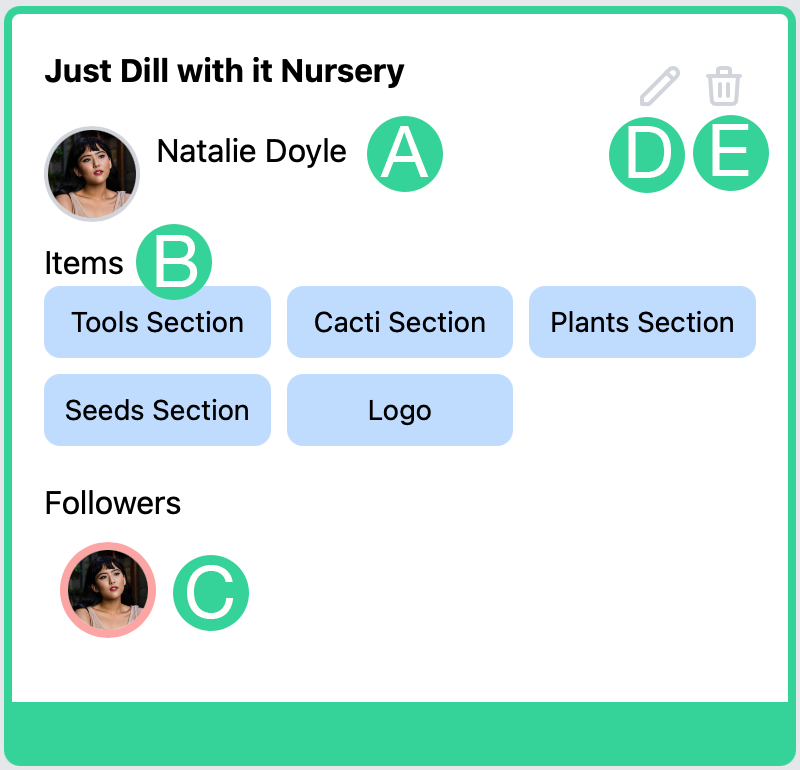
One project
A Project author/owner
B Project items
C Project followers
D Edit project name or followers
E Delete project
Create a new Project
You can create a new project by clicking the new project button. In addition to the name, you also can add other followers to the project that will be able to create new items, commits, and vote on your favorites. By default, the permissions are relatively open so only invite people you trust and who you'd like to have access to all of the assets in the project.
To add a follower search for their name. You will only see matches for people that you have confirmed friendships with. See the profile section below to learn how to make new confirmed friends.
Alternatively, if there is not a friend match found, there will be a button that will allow you to see non-friends who can be added. In that case they will be added as a pending follower and sent a friend request. It is only once they confirm their friendship that they will be able to see the projects. The same goes for inviting someone by email- they will only see the projects once they create an account, confirm the same email address on the profile page that they were invited with and then confirm you as a friend.
The followers list can be updated at any time and once someone is removed, they will not be able to see the project anymore. Note- it is not currently possible for the creator to remove themselves from a project.
Project Detail Page
When you click on a particular project, you are brought to the project detail page. This shows all of the items that belong to a particular project.
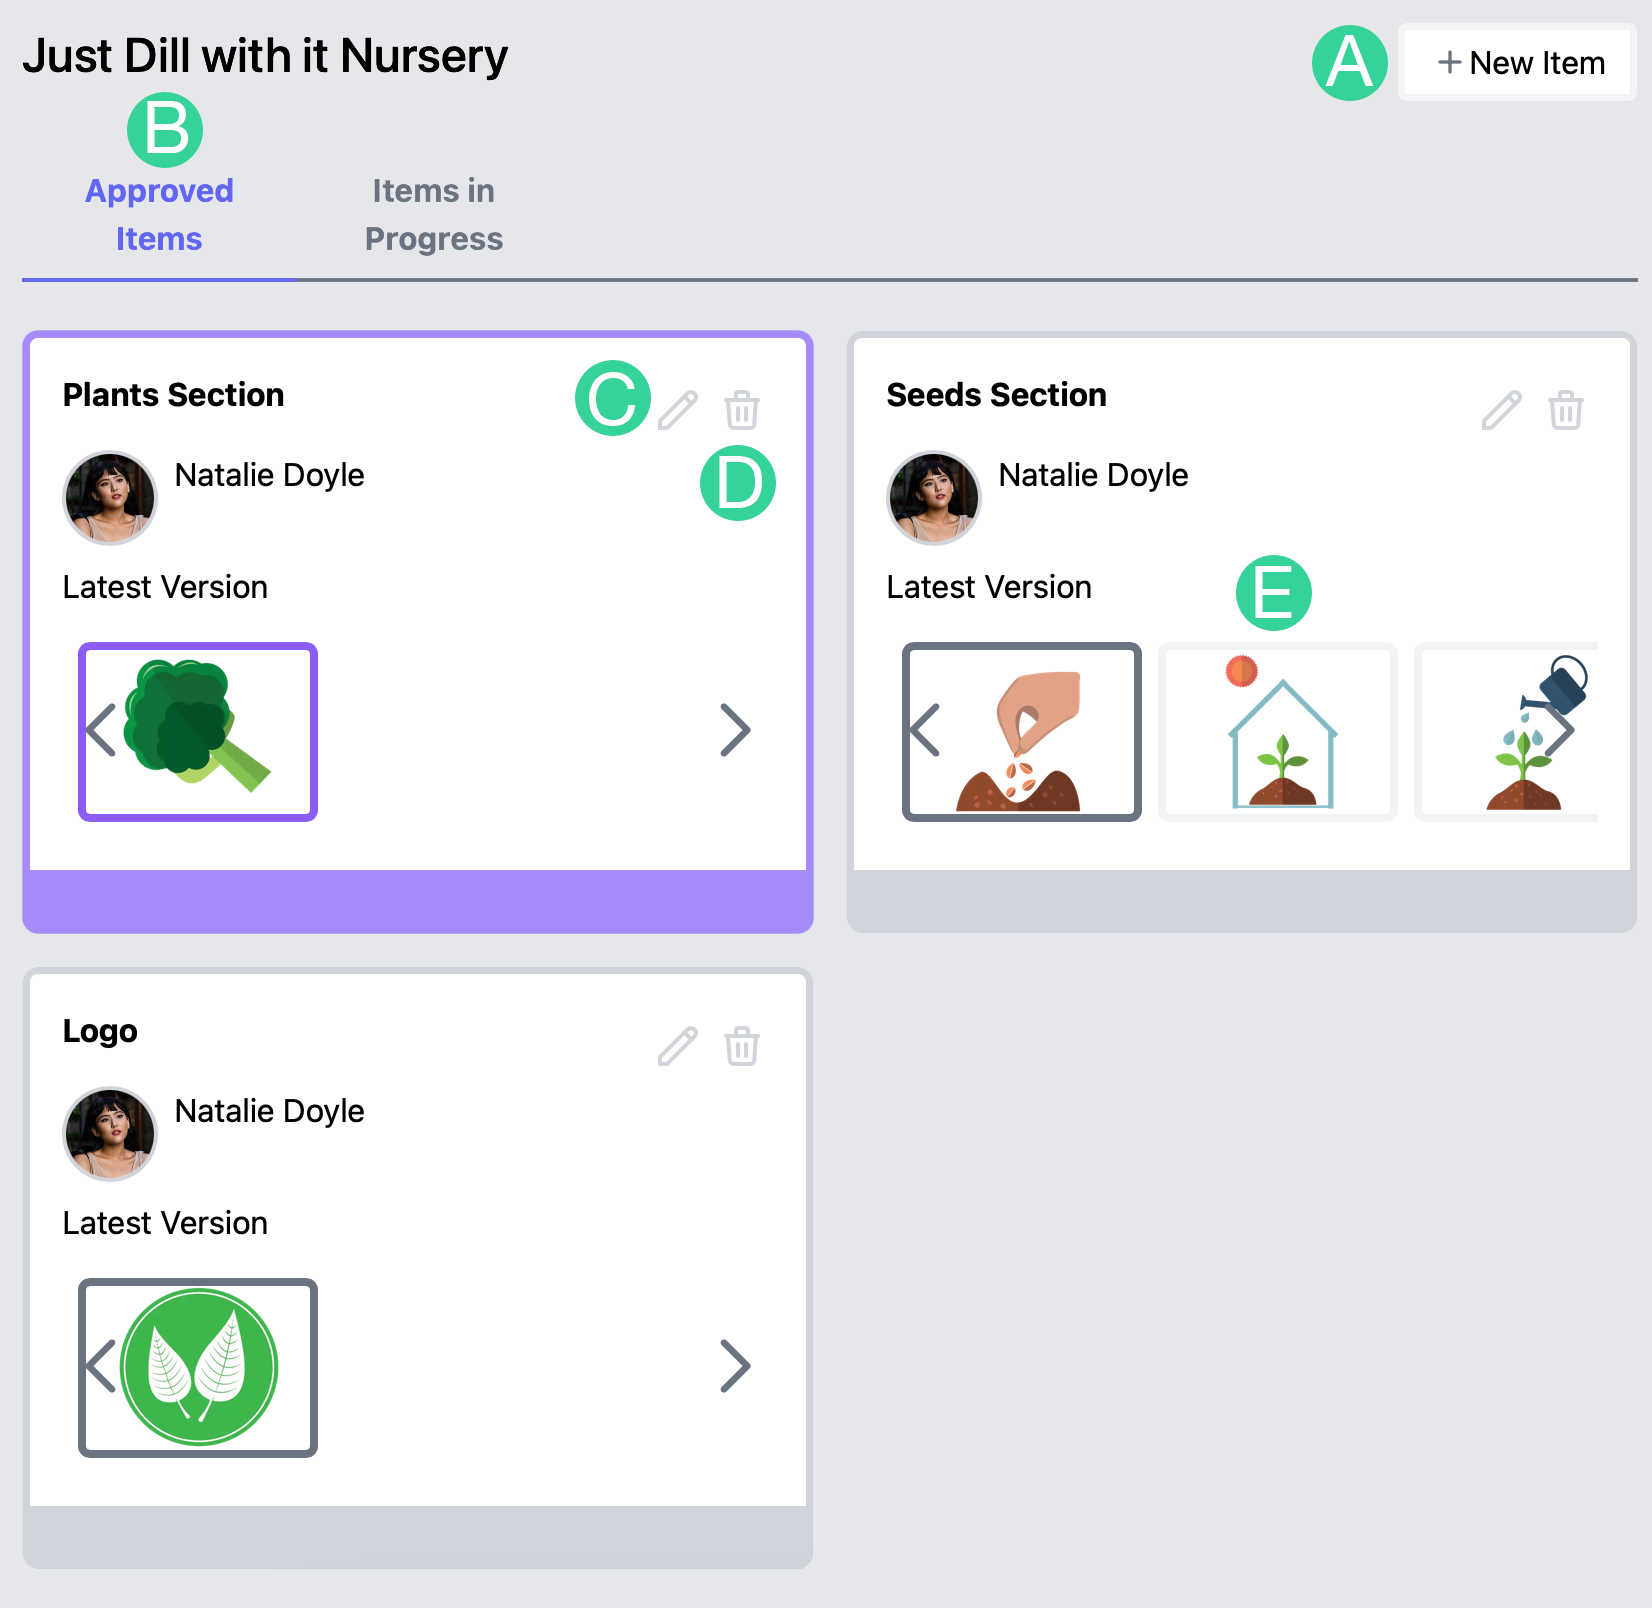
Approved Items
A Create new item
B Approved item selector
C Edit item name
D Delete item
E Highest version thumbnail gallery
By default, the finished items will be displayed (B). These are items that have been previously approved by clicking the approve button on the item's detail page. For a new project, this will be empty until you start creating and approving items.
Create a new item
You can create a item using the create new item button (A). If you ever have to edit (C) or delete those items (D), there are individual buttons for each of them on the item cards. For each item, there will be a thumbnail gallery (E).
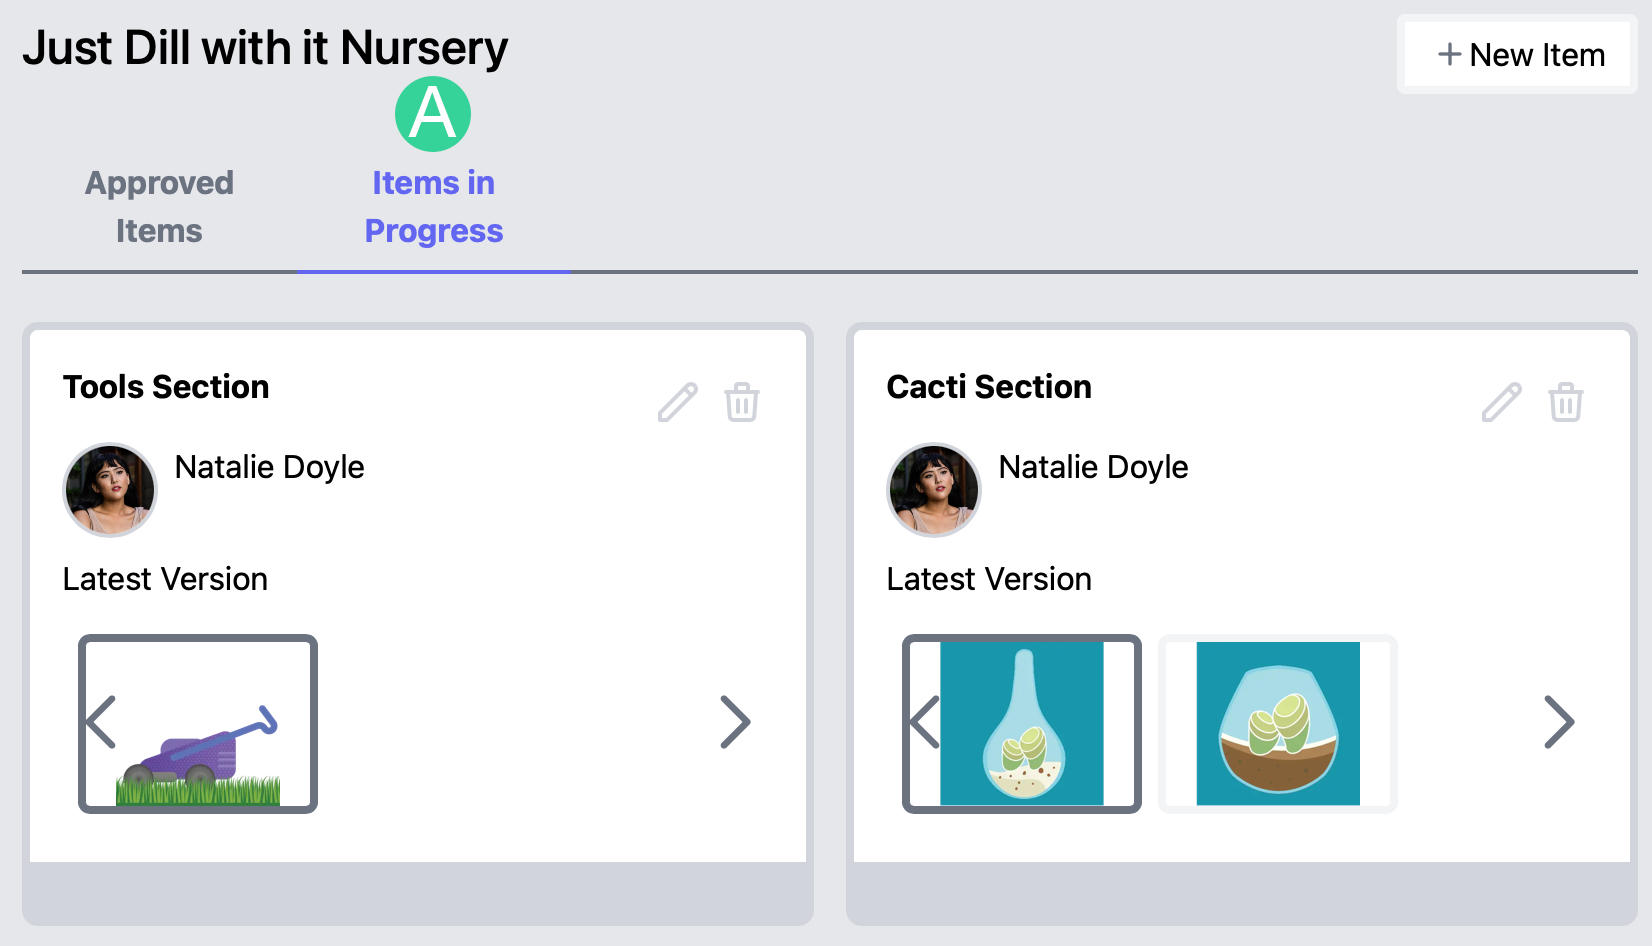
In-progress Items
A In-progress item selector
If you flip over to the in progress items, you can see all the ones which have not been approved. To see detailed information about an item, click on it.
Item Detail Page
Item View
A Approval button
B Project hierarchy
C Currently selected commit
D Thumbnail gallery for currently selected version
E Navigation to traverse items, iterations and versions
F Upload replacement image
G Download current commit
H Vote on current commit
I Delete current commit
J Currently selected version
K Create new version
L Create new iteration
M Currently selected commit
The item detail page is where all the magic happens- this is where you manage all the aspects of the project. First, let's get a few definitions out of the way:
- Commit: a particular image within an item.
- Version: think of a version as a round of edits, each version may have multiple iterations within it in order to test out a variety of options for that round. The most current version will always have a blue box around it (J).
- Iteration: a specific commit within a version (M).
So as an example, in the item view above, we see a total of 6 commits on the left item timeline section. The first version will be the lowest on the list and we can see that version 1 has 1 iteration. The second version inspired 3 different iterations and the latest version has 2 iterations (J). The leftmost item has a purple border around it which means that it is selected (M).
On the right, we can see an item detail section which shows the currently selected commit (C) and a version thumbnail gallery (D) for all of the other iterations within the selected version. Here you can see that the plant nursery was testing 2 versions of a cacti asset in 2 different types of containers.
Below the currently selected commit (C) and version thumbnail gallery (D), there is a navigation and action panel. The navigation buttons (E) allow for traversing in 3 ways:
Navigation Buttons:
- Navigate within iterations in the current version using < and > buttons
- Navigate between versions using the ∧ and ∨ buttons
- Navigate between items in a project using the
<<and>>buttons
For the navigation buttons we have a upload new image (F), download current image (G), vote on current iteration (H) and delete iteration button (I).
Voting
Voting is used to determine the favorite iteration for each version among the people who follow the project. You can only vote on one iteration so if you pick another in the same version, it will switch automatically. You can tell which iterations that other people have picked by hovering over a particular one on the left timeline section.
The left timeline section will calculate which iterations have the most votes per version and attempt to draw a straight path from the first version to the most recent version. In the event of a tie, you will see yellow dotted lines going to the iterations that are currently tied and if someone switches their votes around, the arrows will be redrawn accordingly. In the example above, we can see that:
v1 iteration 1 → v2 iteration 2 → v3 iteration 1
Creating a new Commit
Now that we've run over the layout of the page, let's actually create some new commits. The first thing to do is create a new version (K). This will create a new version and a single iteration. You can now upload your version using the upload button (F).
You may continue to add new iterations to the version by pressing the add iteration button (L). Once your followers vote on their favorite for this round, create a new version and add new iterations just like before.
You can create as many iterations and versions as you'd like until you create a final commit. Then, you can click the approve button (A) and you are done!
Profile Page
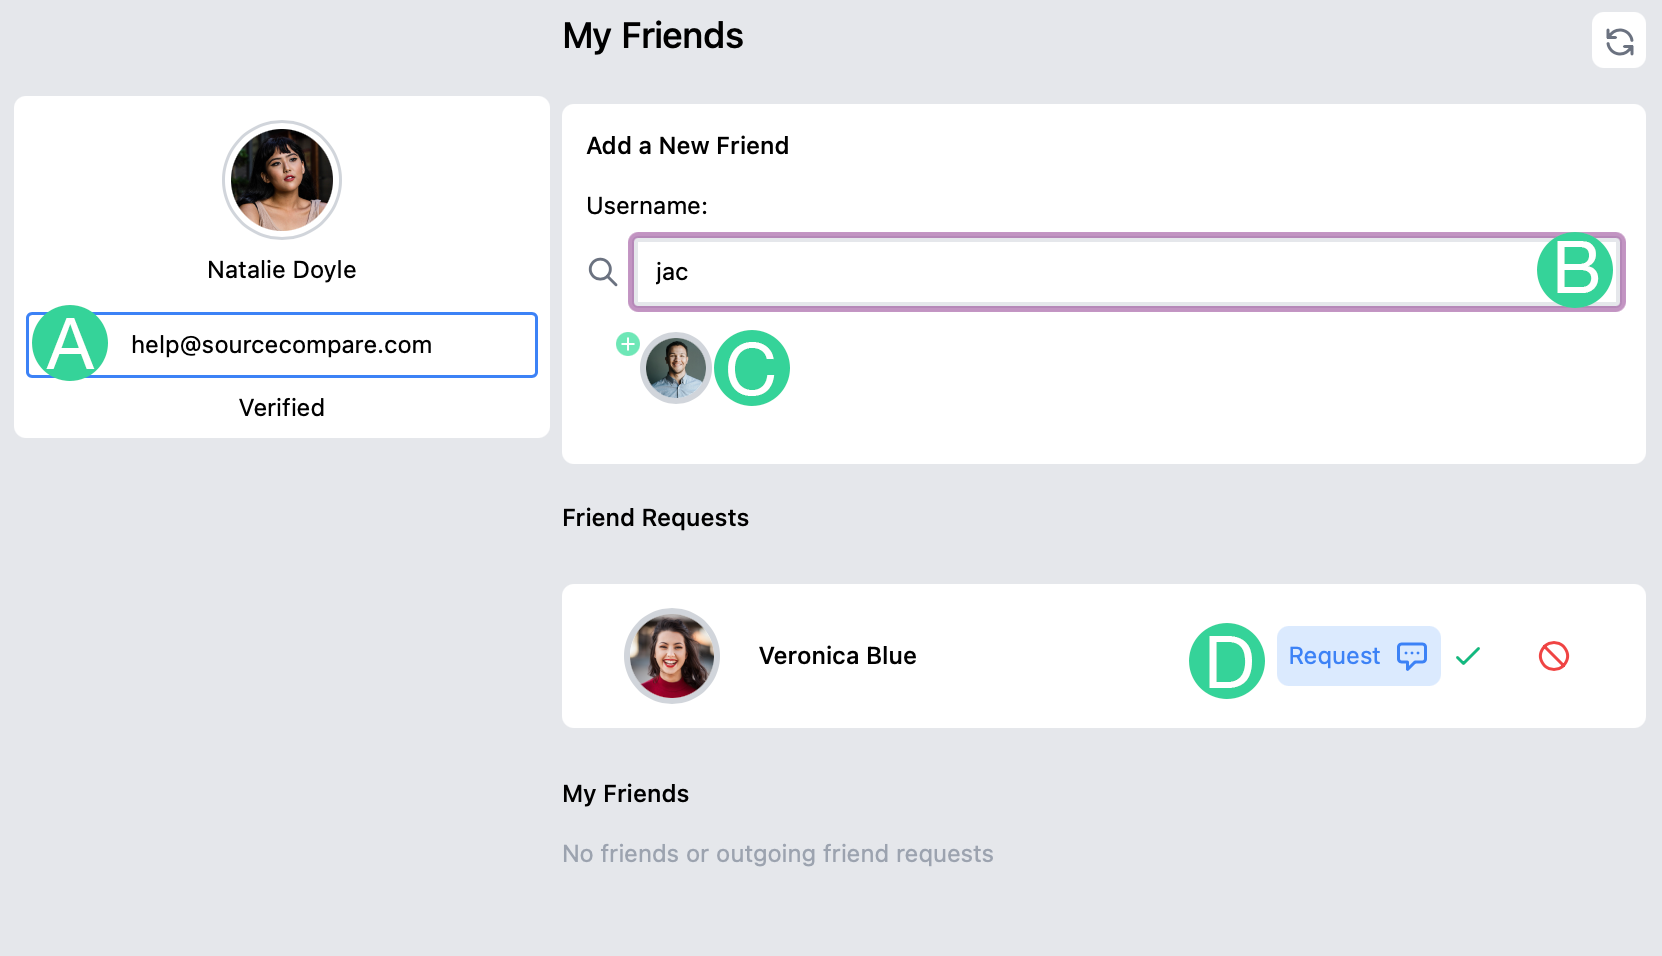
Profile page
A Enter and verify your email
B New friend search
C Send friend request
D Incoming friend request
The profile page allows you to verify your settings and manage friendships. You should verify your email because it allows the system to link any pending project invitations to your account (A). To verify your email type it in to send a verification email to that address. You will receive an email with a verification code that you can enter in and provided that it is correct, the text will switch from not-verified to verified.
You must confirm a friendship with someone before you are allowed to invite each other to projects. This is true both for inviting them to a new project and also for any pending projects that they might have invited you to.
To send a friend request, enter their name into the search bar (B) and you will see matches based on that name. Click the green plus button to add them as a friend (C). In your friend's profile, your request will show up and they will need to press the green check mark to approve it (D).
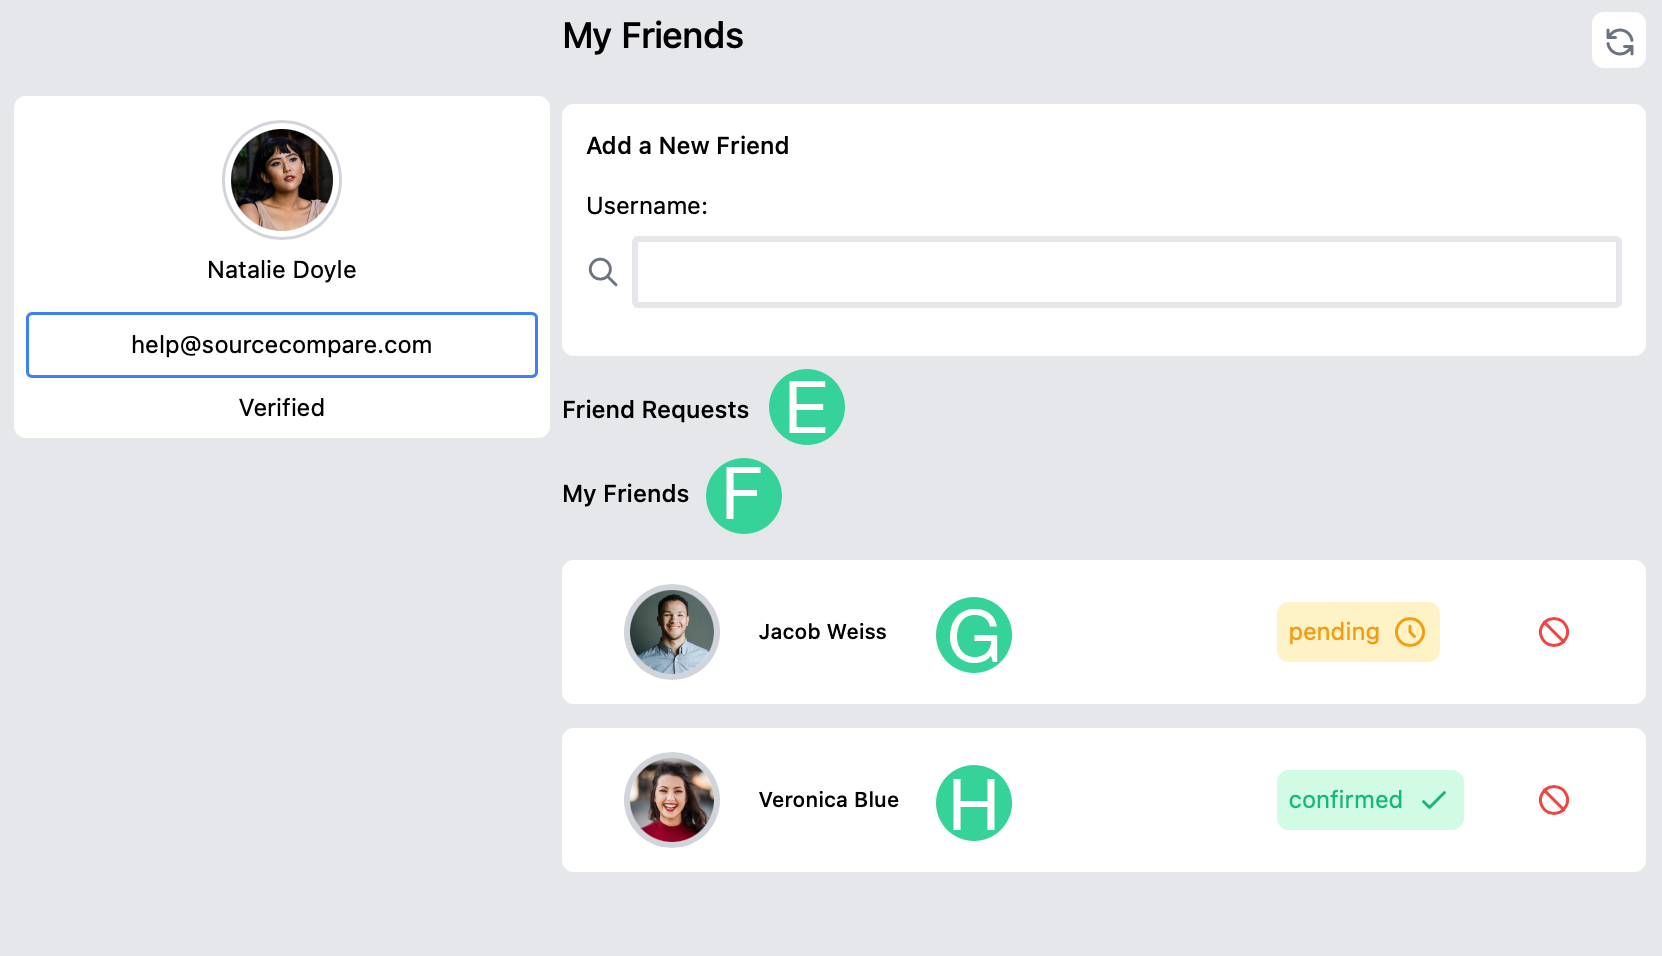
Profile page pending
E Friend requests section
F Friends section
G Pending friend
H Confirmed friend
Once the friend has been requested, they will show up as pending (G) on your end and a request on their end (D).
Both when friends confirm your requests or when you confirm a friend's request, they show up as confirmed friends (H) and you both may add each other to any of your projects.